Starting Point + Surricata (IDS/IPS)
Before following the tutorial you will have to create a virtual machine with Kali Linux, make sure it is on the internet, and go (from your host machine) to this link to download OPNsense. The download is quite intuitive.
If your host is a Windows machine you may encounter some difficulty decompressing the file you just downloaded.
Once you have downloaded opnsense you should notice, in fact, how it has been compressed in a “non-canonical” way, you can decompress this file by downloading bzip2. Downloaded from the official website, using powershell you can go to the folder where the OPNsense was downloaded and unzip it:
( .\bunzip2.exe —help to get an overview of the objects you can use).
Continue independently with the installation of this new machine (now you have the file) and configure the LAN and WAN.
Tips and checks
If you have never configured something like this you can search YouTube for tutorials relating to the first start of OPNsense/PFsense; once the initial configuration has been done, return to this page to align with the screen below and continue with the guide.
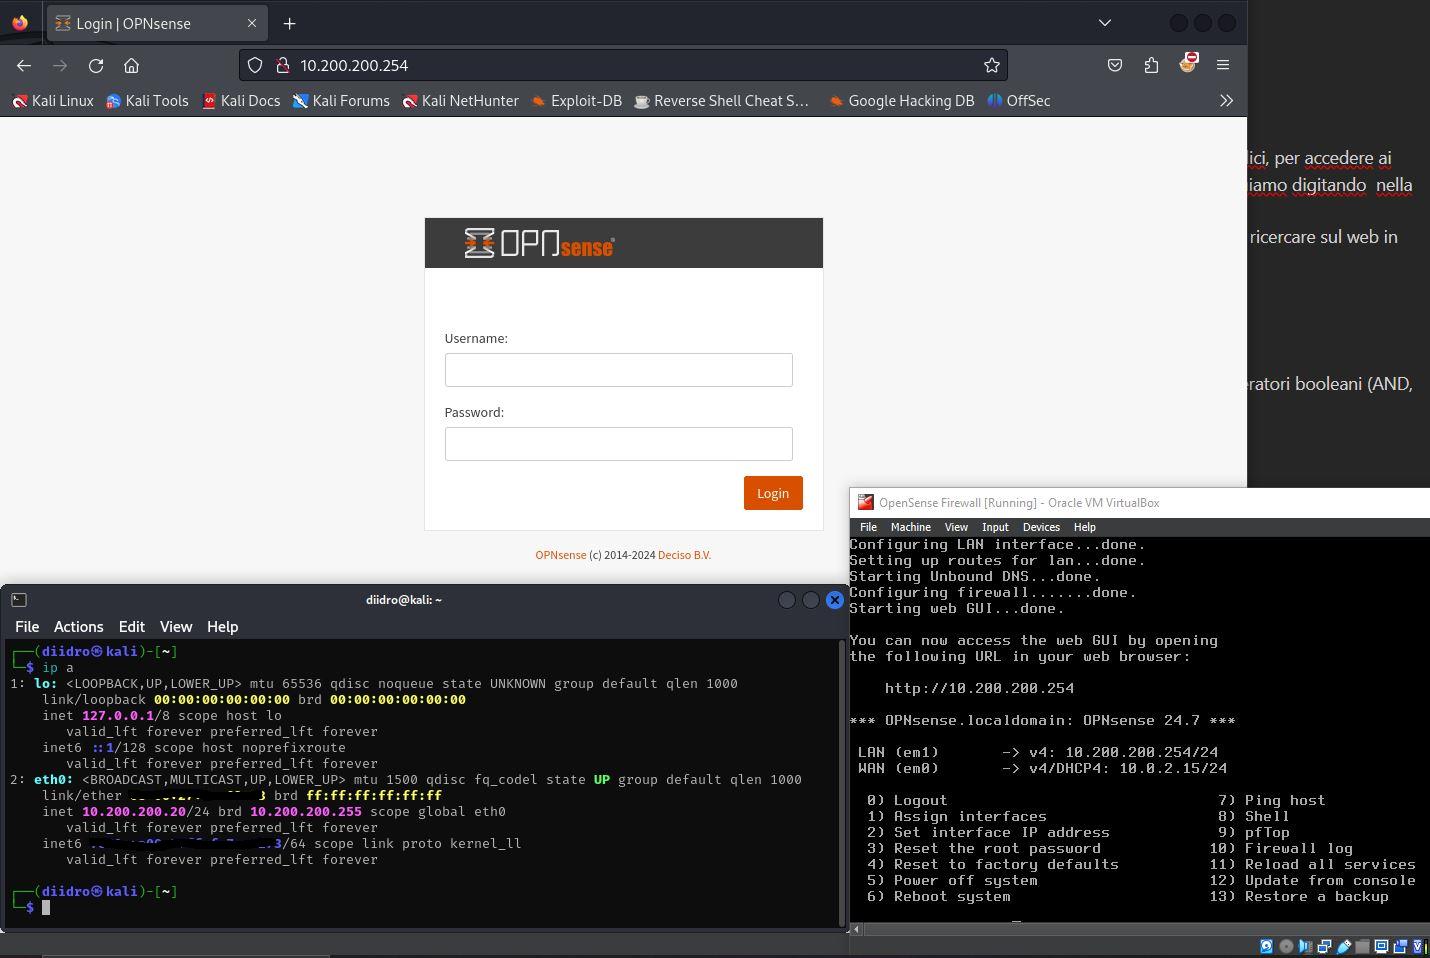
During configuration you will be asked if you want to activate the GUI, click yes and, once everything is configured, write the IP entered in the LAN configuration in the browser URL.
Update
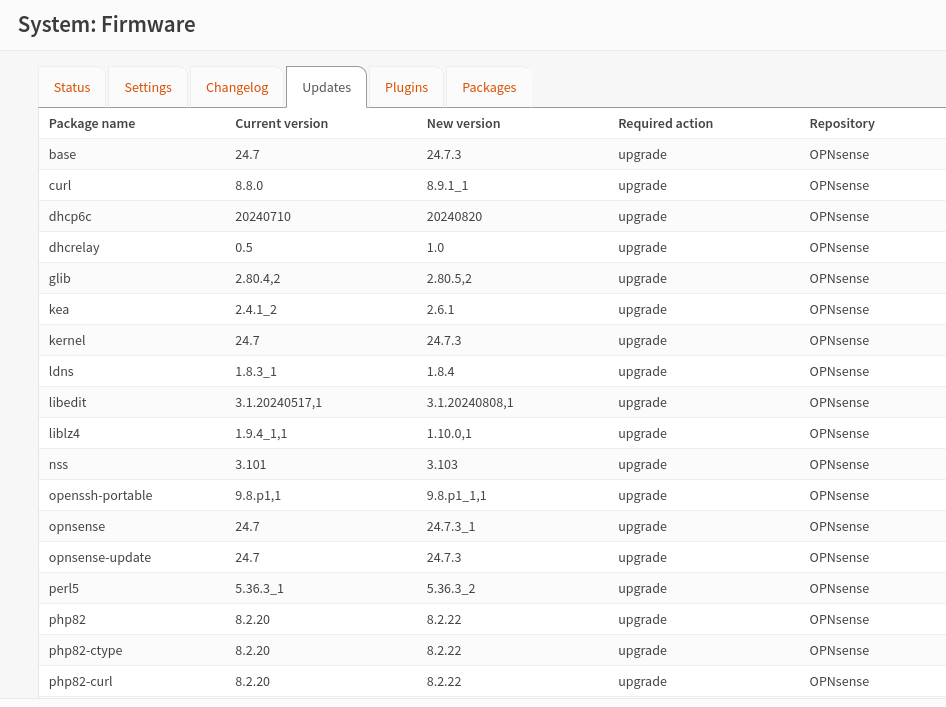
Once logged in (the default credentials are id:root, pw:opnsense) we need to update everything, then go to system, firmware, status and click check for update.
After confirming the update, since we are working on virtualbox, we will have to install the os-virtualbox plugin which, post-update, we find in the appropriate section. This operation is also quite intuitive, click on the “add” button located in the same line as the plugin concerned and follow the guided path.
Surricata
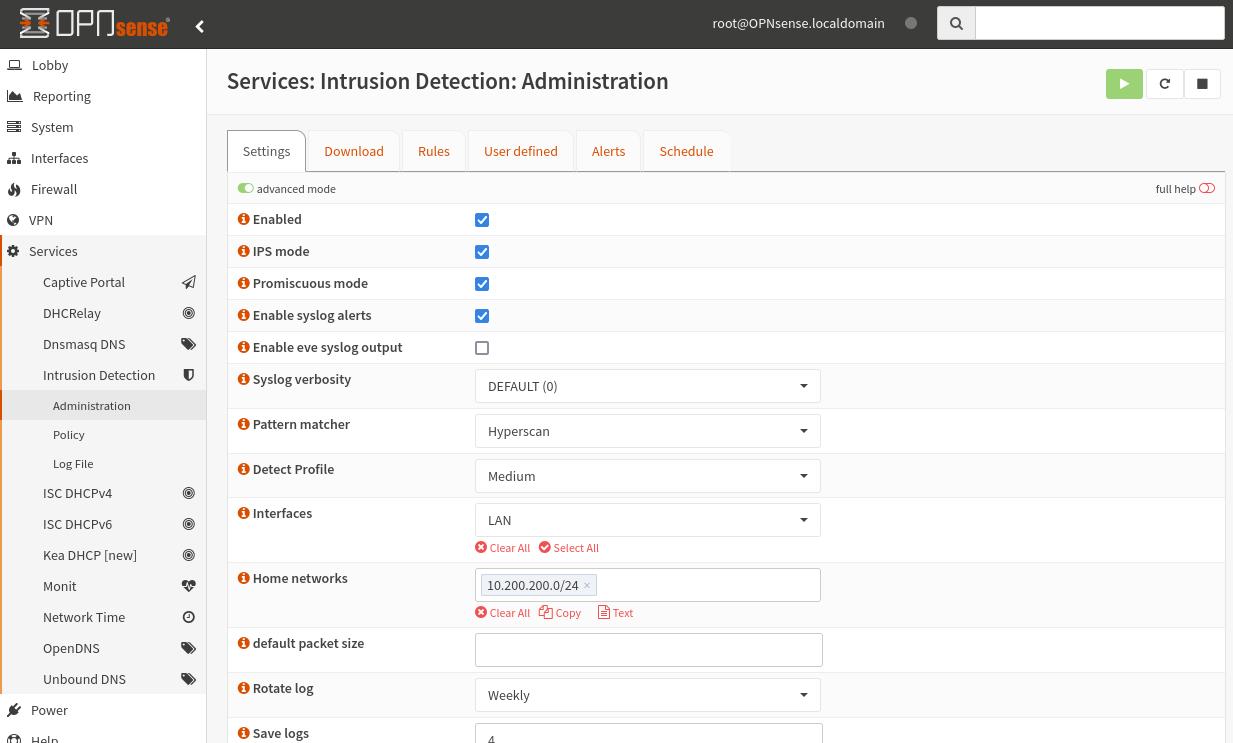
To install the intrusion detection system on opnsense just go to Service, Intrusion Detection, Administration and go to advanced mode. By clicking on the “i” next to the setting title you can obtain an explanation regarding the function; alternatively you can click on “Full help” to get additional information on each individual field.
NB: As a pattern matcher I selected Hyperscan because it is more modern and optimized to work with modern processors (as well as supporting strong parallelization and being highly scalable). It is perfect for working with Snort and Surricata.
Let’s continue now by creating the firewall rules.
In the first example, just for demonstration, I will create a rule by hand from CLI and import it to OPNsense; in the second example, however, we will use the OPNsense GUI, a quicker and more intuitive method.
From CLI (on Kali)
We will write this rule from the terminal by issuing the command:
nano [document name]
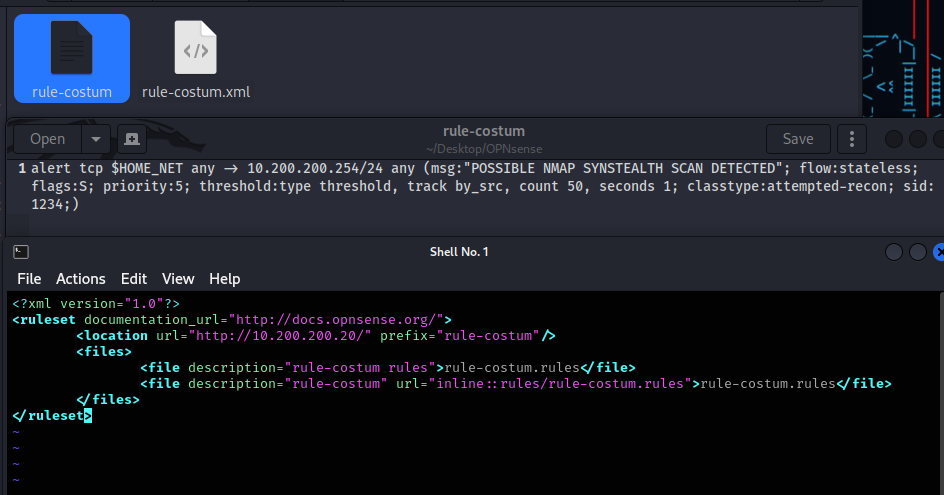
Once the document is opened, here is the rule that I will insert (explained below) Our rule will be as follows:
alert tcp $HOME_NET any -> 10.200.200.254/24 any (msg:"POSSIBLE NMAP SYNSTEALTH SCAN DETECTED"; flow:stateless; flags:S; priority:5; threshold:type threshold, track by_src, count 50, seconds 1; classtype:attempted-recon; sid:1234;)
- alert, is the action that will be performed;
- tcp, is the protocol;
- $HOME_NET, will be a “placeholder” for our “home network”.
- any -> 10.200.200.254/24, all traffic directed towards our firewall
So far we say that all the traffic arriving from the home network on the TCP protocol (on each port) directed towards the firewall must generate a message saying that it is a possible nmap stealth scan (detected).
OT: namp is used for information ghetering by hackers, it’s one of the first steps.
- flow:statless, indicates the stateless state, it is based exclusively on the individual configured rules, the packets are analyzed individually;
- flag:S, is the tcp flag, the S indicates SYN (syn stealth scans work as if they were sending syn requests to the server but the three-way-handshake is never completed obtaining half-open connections).
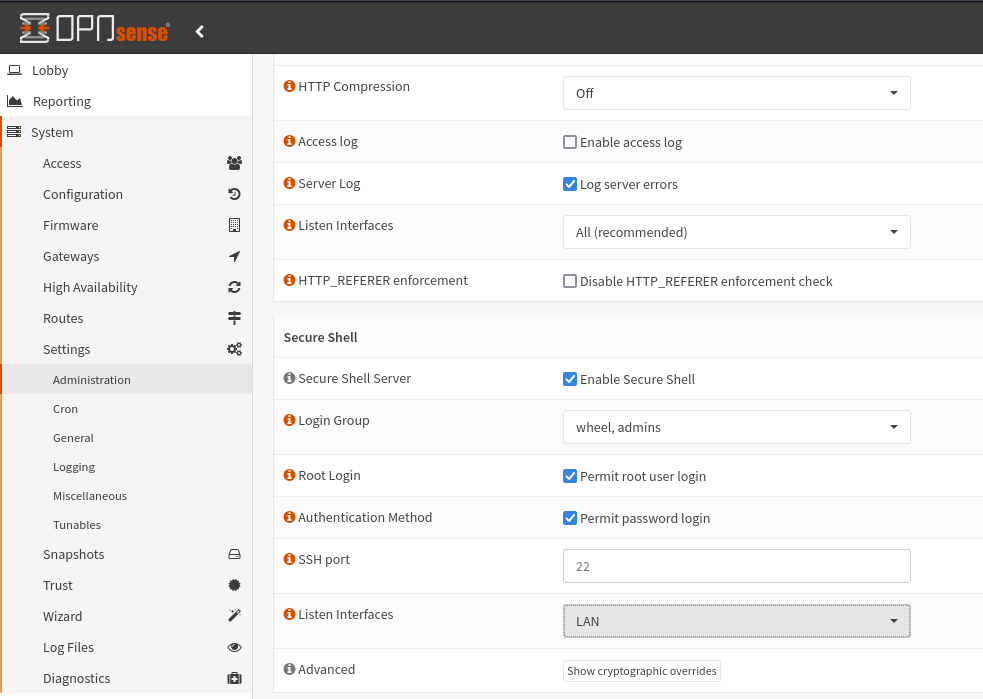
This rule now needs to be moved to OPNsense somehow. Let’s prepare the work environment by going to System, Settings, Administration; we will connect via SSH.
NB: In this case we will use root for login and the insertion of the password as Authentication Method; in real life it is recommended to authenticate via certificate (in the next chapters you will see how they are created).
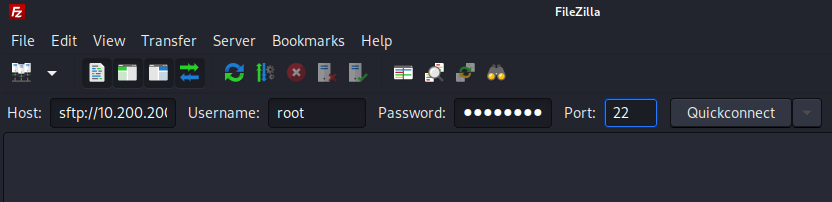
To establish a connection with opnsense, the quickest method is to use “filezilla” which will take care of establishing an sftp connection to our target (helping us in our aim). Let’s continue installing filezilla on kali with the classic command:
sudo apt install filezilla
Once this is done, we invoke the tool, the GUI will open, and we compile as in the image.
Once inside we should insert the file containing the previously written rule (custom) into the rule directory. To do this we will use a file in xml format which will tell opnsense where to download the rule written by us (in the location url item).
In the screen below you can see the two files that I will use:
We can visualize in the image below the two directories that interest us: the first, the one on the left, is the directory where we have the two files to transfer; on the right, however, the OPNsense target folder. We will only move the .xml file, through this we will recall the file with the previously written rule (we must activate the http.server server)
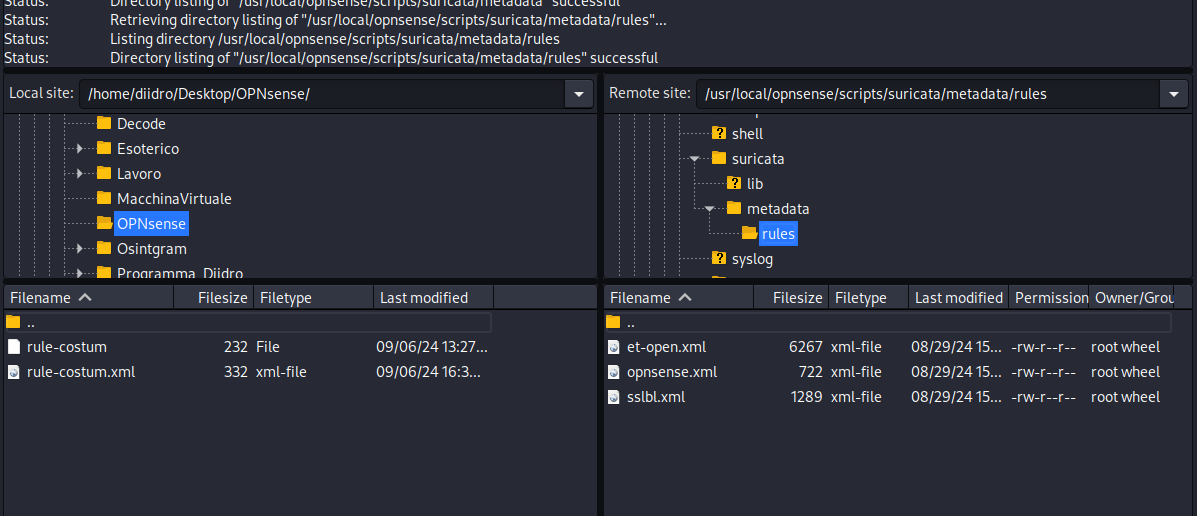
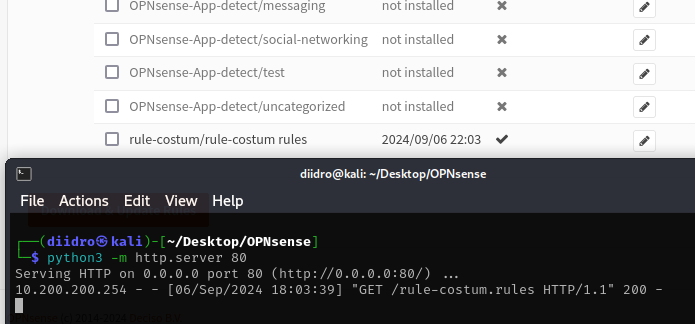
In the directory where we have the two files on the host we are going to activate the server via Python on port 80 to allow opnsense to download the rule.
When we go to service, intrusion detection, administration, download and update everything using the button at the top right, we may find our rule (the .xml file) among others. When we select it, click enable selected and then download & update, the query will be started and the rule will be downloaded from the server previously activated on port 80.
In the Schedule section of the same sub-page it is possible to schedule activities to automate them, although it is useful as a practice in companies, using a single rule is not the case to apply it in our case.
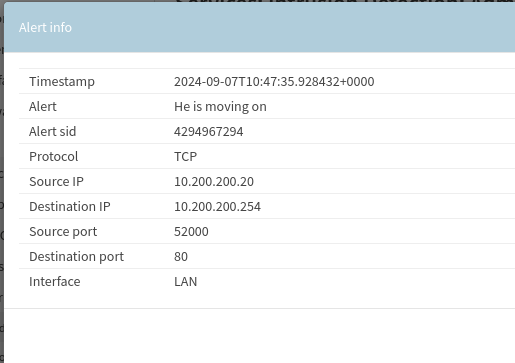
Everything is ready, we confirm the correct functioning of the IDS by starting an nmap from kali towards the firewall. We will use the -sS object to indicate a synscan; -Ps to make sure that if the target does not respond to the ping it must continue scanning; —top-port 500 to scan the first 500 ports; firewall is the word that I set to correspond to the IP 10.200.200.254 (you can set it via the nano /etc/hosts command).
Costum Rule from GUI
A simpler alternative to create custom rules is located in the “User defined” section, try inserting a basic rule (or alternatively you can enable the pre-installed rules) relating to ping to see how it appears in the Alerts screen.
This alternative is very quick and intuitive, in the appropriate section you will see something similar to this: